
With many years of underwater photography and post-processing experience, Anna Ewa Manzel—Assistant Manager at Solitude Lembeh Resort and Marketing & Communications – Europe—brings both technical insight and a collaborative spirit to the dive community. She began using Photoshop with version CS2 and is self-taught through numerous tutorials, now specialising in the post-processing aspect of the in-house workshops alongside renowned photographer Patrick Neumann. This collaboration has shaped a practical, approachable culling method.
Anna shares her workflow for sorting and managing underwater images in this article.
If you’re interested in learning about photo editing, Anna can assist you during your stay at Solitude Lembeh Resort; just ask her.
Anna’s Culling Workflow
Culling – How to Easily and Quickly Choose Which Photos to Keep
We understand the feeling: you’re excited about potentially capturing amazing photos, but then dread going through hundreds of them, losing track, and feeling overwhelmed by too many files.
Don’t worry! There’s a simple, non-technical way to organise your photos.
Before Importing to Lightroom
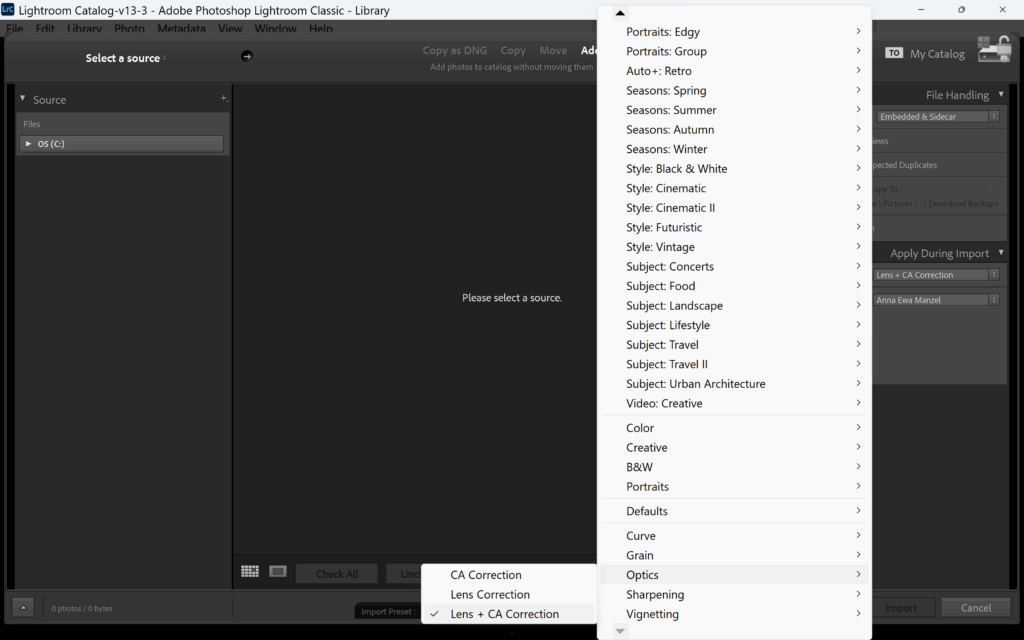
One helpful tip to streamline your workflow is setting up a default adjustment in Lightroom that will automatically apply to all photos upon import. You only need to do this once—Lightroom will remember it for future imports.
Go to:
Apply During Import → Develop Settings → Optics → Enable Lens Correction and Chromatic Aberration Correction
This saves you from having to manually check those boxes later for each image. These settings correct for common distortions caused by your lens (like curved lines or dark corners), and remove colour fringes that often appear in high-contrast areas of your photos.
Once that’s done, import all your images directly into Lightroom—not via your computer’s file browser—so the software can properly manage and catalogue everything from the start.
Culling Your Photos
Once your photos are uploaded, the real work begins: reviewing your shots. Be strict to avoid wasting time on obviously unusable images and instead focus on identifying the good ones.
Start by enlarging the first image. If it’s out of focus, too dark, the subject is cut off, or it simply doesn’t appeal, press the “X” key to reject it. Use your arrow keys to move forward. For a quicker process, turn on “Caps Lock”—Lightroom will automatically advance to the next photo after each rejection.
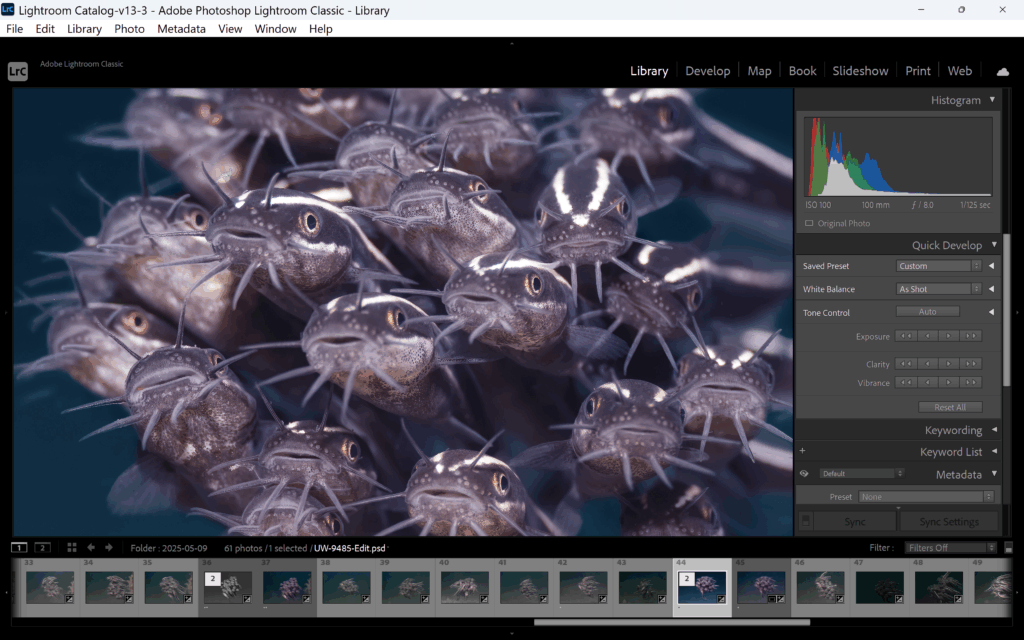
Be honest with yourself. If the eyes aren’t sharp or the moment doesn’t land, you likely won’t use it. Clearing these out now makes your editing sessions faster and more rewarding later.
Rating Your Keepers
Everyone has their own preferences for organising photos, and this is an example of a rating system you can adapt.
Once you find a photo you like, use the numbers 1 to 5 on your keyboard to assign a rating. You can customise the meaning of these stars, but here’s a helpful baseline:
- 1 Star – Photos to revisit later
- 2 Stars – Images you genuinely like
- 3 Stars – Excellent candidates for editing and sharing
You can fine-tune your selections later. At this stage, focus on rating what’s worth keeping and rejecting the rest.
Deleting Rejected Photos
After you’ve reviewed all your images and flagged the unwanted ones, go to the top menu in Lightroom:
Photo → Delete Rejected Photos —or use the shortcut CTRL + Backspace.
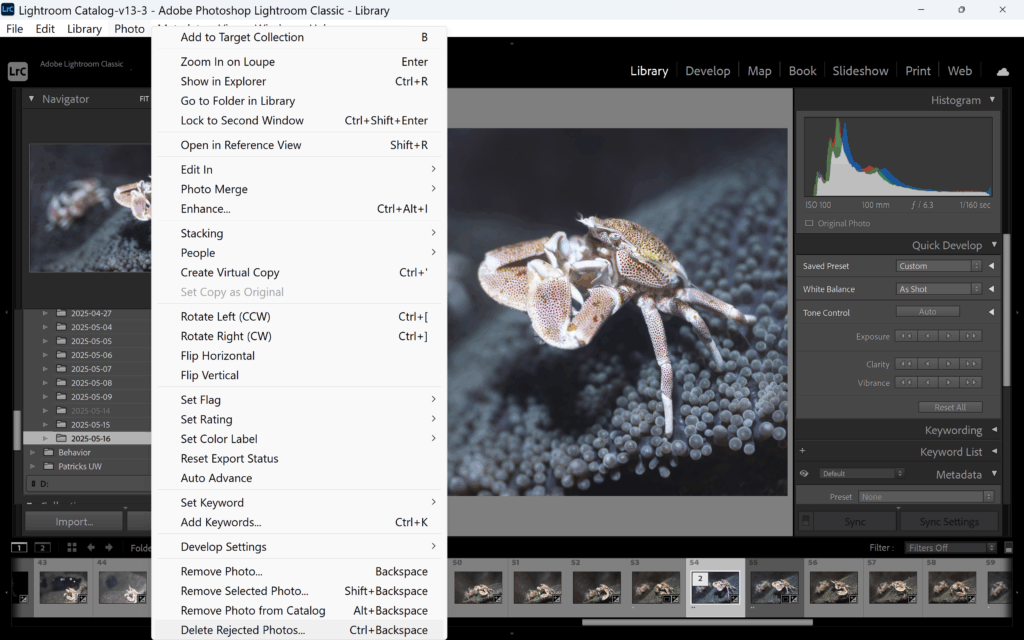
What began as 400 files might now be a manageable 70 sharp, well-composed photos that actually excite you.
Viewing Rated Images
To see only the images you’ve rated, head to the Filter Bar at the bottom of Lightroom and click on “Rated.” This allows you to view only your selected shots. You can narrow the view by star level, or toggle it off to return to your full set.
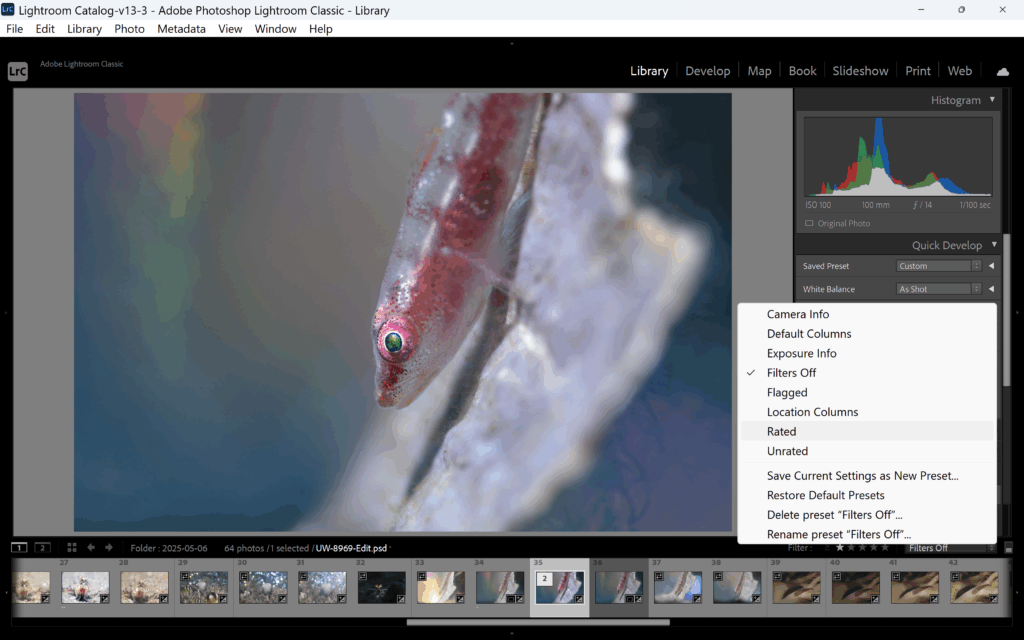
This efficient process—taking just 20–30 minutes a day—makes it easier to focus on developing your best images and keeps your library clean and navigable. And who knows? Maybe your 4-star today becomes your 5-star contest winner tomorrow.