
Why Snooting Is the Natural Next Step in Your Creative Underwater Journey
In macro photography, precision is everything. A wide strobe floods the scene, but a snoot lets you shape the light—revealing a subject while the rest dissolves into darkness. The result? Depth, texture, and atmosphere in a single, striking frame.
A snoot isn’t about adding more light—it’s about learning restraint.
What Is a Snoot?
A snoot is a narrow tube or optical device fitted over a strobe or video light. It funnels and focuses the beam into a small, controlled circle, illuminating only what you want to highlight. Everything beyond that circle fades to black, creating contrast, mystery, and visual impact.
Think of it as a spotlight in a dark theatre—except your stage is the reef.
Underwater, this selective lighting allows you to:
- Eliminate backscatter by avoiding stray light hitting particles in the water
- Create instant black backgrounds without post-processing
- Direct the viewer’s gaze exactly where you want it
- Add mood through controlled, sculptural light
How Snoots Work
Snoots simply restrict and shape light—but how they do it makes a huge difference.
| Type | Mechanism | Ideal Use | Notes |
|---|---|---|---|
| Basic Tube Snoot | A simple, narrow barrel | Beginners, budget builds | Easy to DIY but light edges can be harsh |
| Optical Snoot | Uses internal lenses to collimate light | Crisp, defined spots | Excellent control, common in pro gear |
| Fiber-optic Snoot | Channels light through flexible fibers | Extreme precision | Great for super-macro and tight spaces |
Optical snoots like the Retra LSD or Backscatter OS-1 use built-in aim lights so you can preview exactly where your beam will fall—making creative lighting far more intuitive.
DIY Snoot Builds: Simple to Advanced
Basic Tube Snoot (5-minute build)
- Materials: black PVC pipe, matte tape or foam, O-rings to fit your strobe head
- Cut to length (longer = narrower beam), line with black material to reduce spill
- Test on land: you should see a clean, circular spot without bright edges
Honeycomb Add-on
- Insert cut drinking straws inside your tube for a tighter beam and less spill
- Works well for video lights or basic strobes
Fibre-optic Snoot (advanced)
- Use a bundle of optical fibres or Loc-Line arms
- Direct the light to a tiny exit aperture near your subject
- Great for super-macro when you need pinpoint accuracy
Whichever style you build, seal it securely and test alignment thoroughly before diving.
Snoot Positioning: Light Direction & Mood
Light placement transforms the feel of your image. Use these classic setups as starting points:
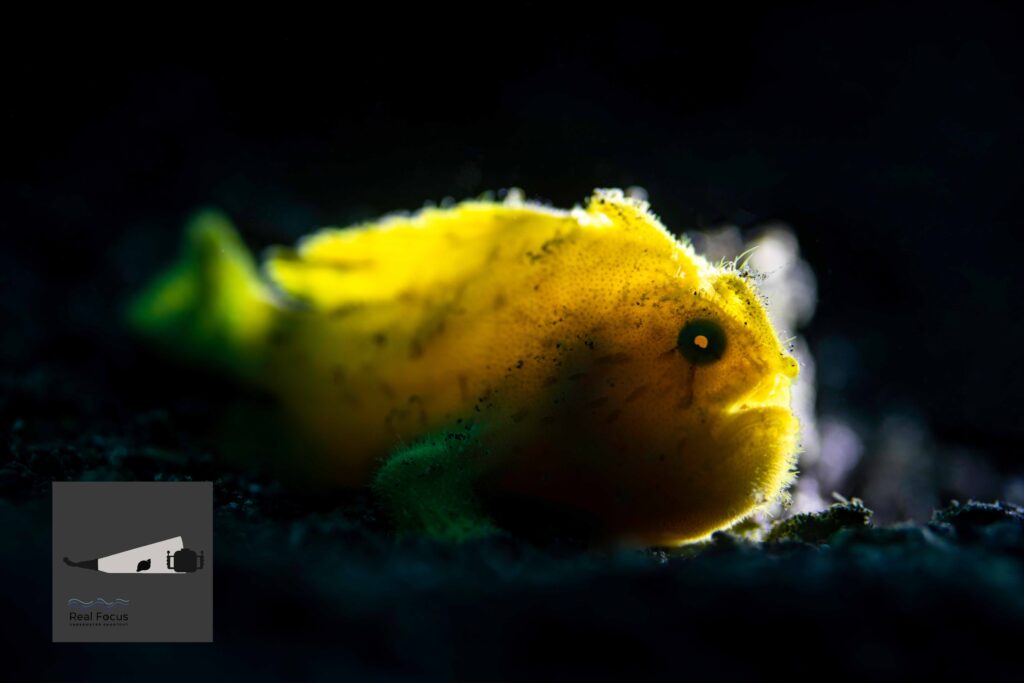
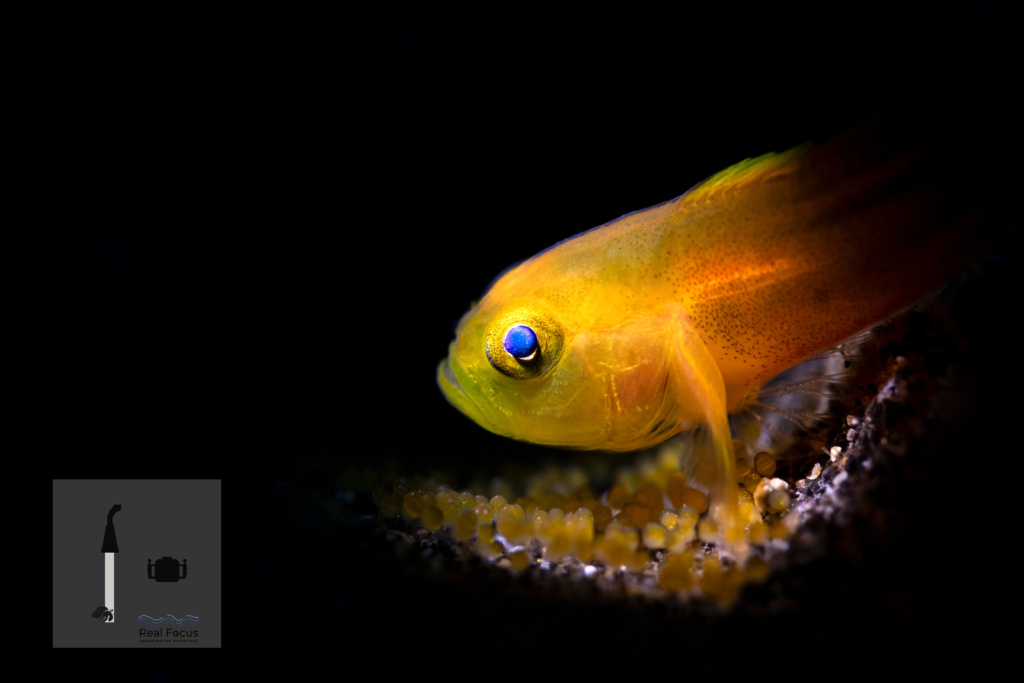
- Top-Down Spotlight – the “stage look”
- Light falls from above, isolating the subject cleanly against black.
- Side Cross-Light – texture & relief
- Light grazes across the subject, revealing fine detail and dimension.
- Backlight / Rim Light – glow & translucence
- Light from behind the subject outlines forms in a luminous halo.
- Low Up-Light – dramatic & eerie
- Light rises from below, creating a moody or surreal tone.
- Tight Detail Light – precision storytelling
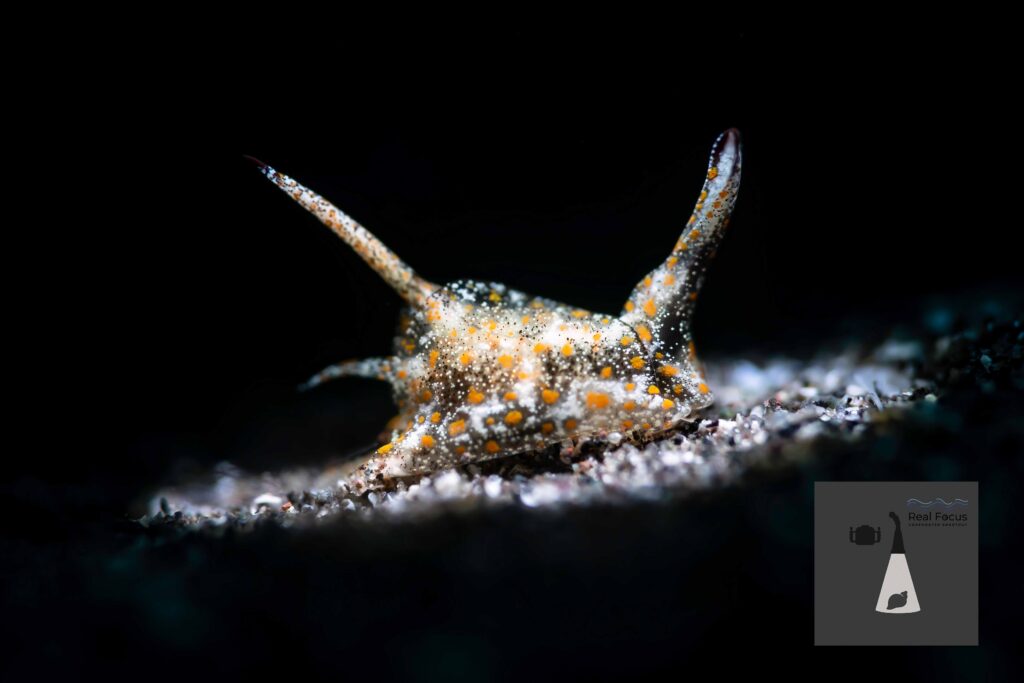
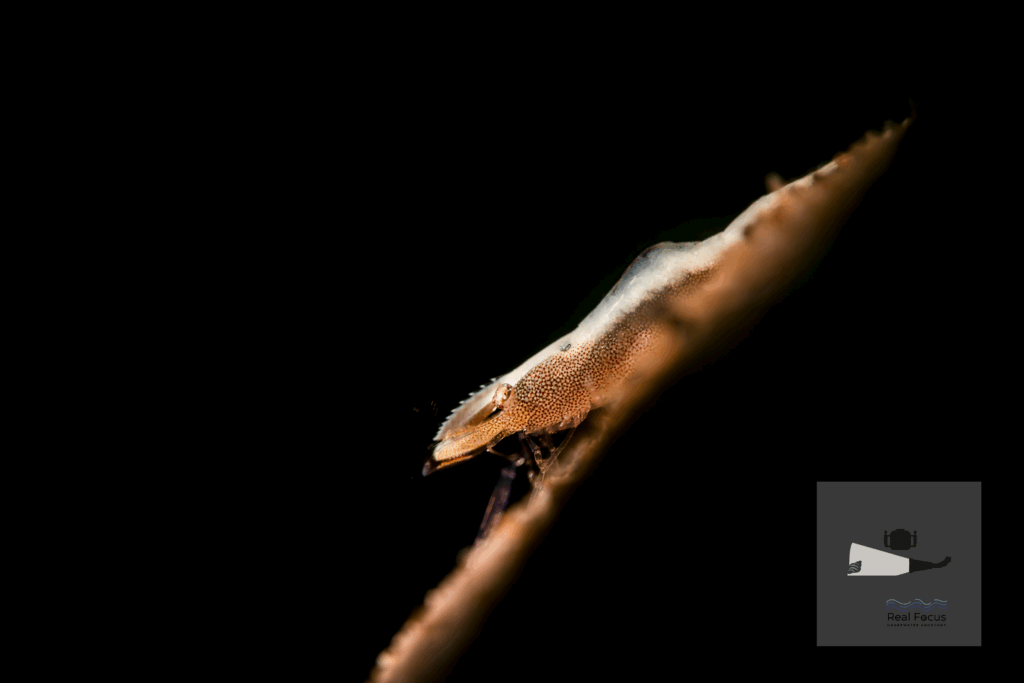
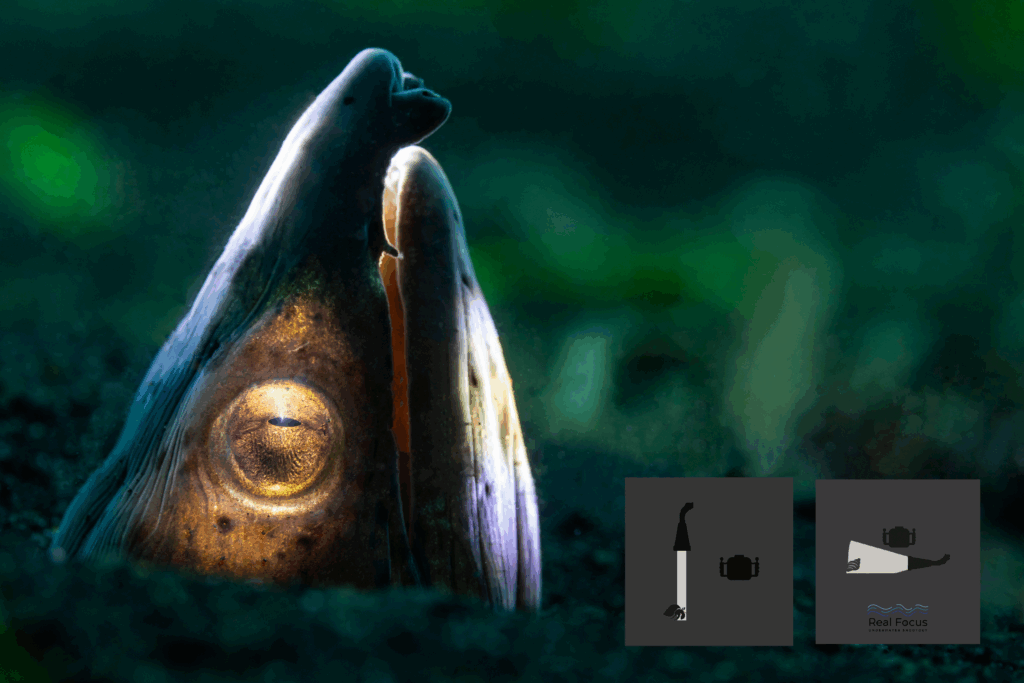
- Focus light only on a rhinophore, eye, or claw. Everything else vanishes.
- Wide-Angle Accent – ambient + spotlight
- Use with wide-angle or CFWA: the snoot isolates one coral or diver detail while the blue water holds the background.
TOP – Snoot positioned above the subject, casting light directly downward.
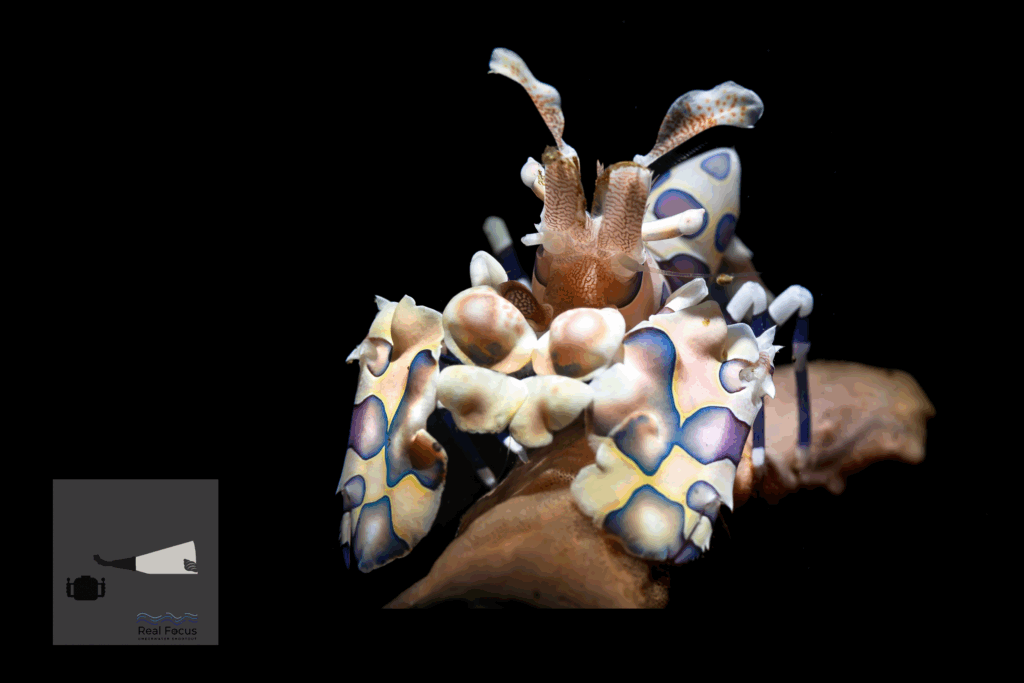
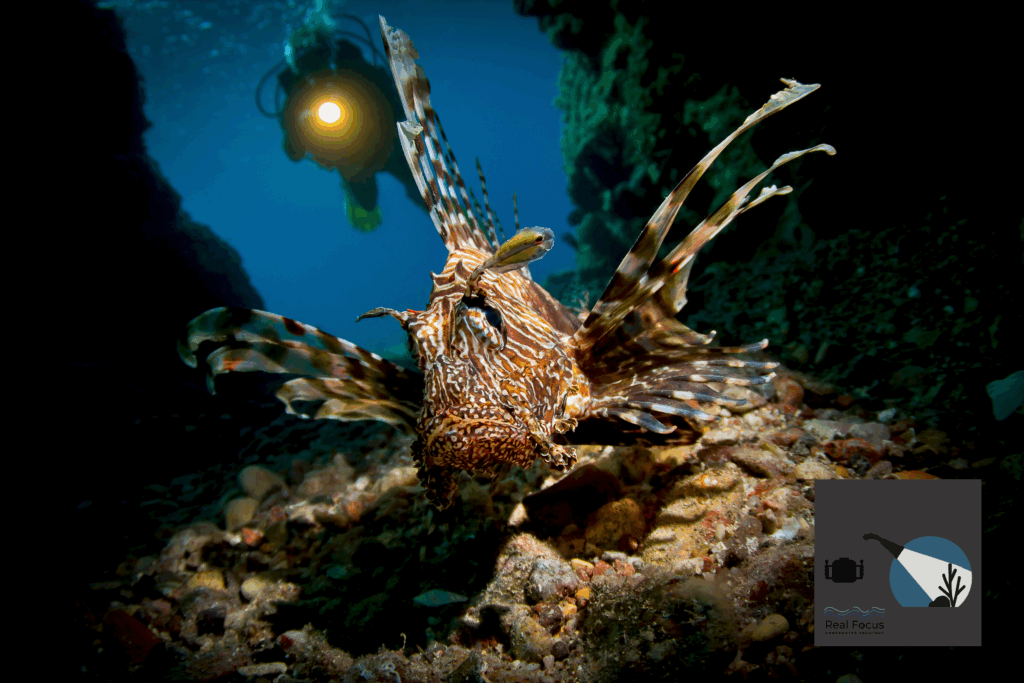
FRONT – Snoot aligned directly with the camera, lighting the subject evenly head-on / from the front.
BACK – Snoot positioned behind the subject, creating a rim glow, halo, or silhouette.
BACK – Snoot positioned behind the subject, creating a rim glow, halo, or silhouette.
SIDE – Snoot angled from the side to reveal surface texture and depth.
DETAIL – Snoot tightly focused on a small feature such as the head, an eye, rhinophore, or claw.
WIDE – Snoot used with ambient light to accent one subject while retaining environmental context
COMBO – FRONT + SIDE LEFT + SIDE RIGHT. A frontal snoot illuminates the subject evenly, while twin side beams from left and right sculpt form and reveal full-dimensional detail.
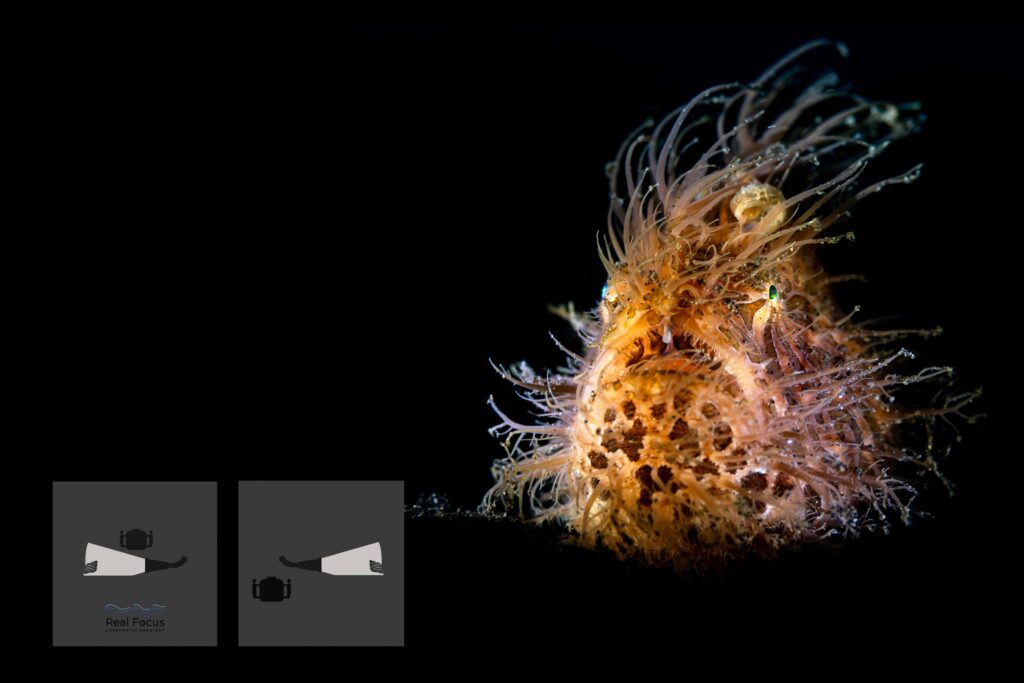
COMBO – DETAIL + SIDE. One snoot highlights the eye for precision, while a second from the right adds side light to define texture and shape.
Images: Patrick Neumann
Real Focus Shooting Tips
- Start with stable subjects—nudibranchs, shrimps, or scorpionfish.
- Keep ambient under control: f/16–f/22, ISO 80–200, 1/160–1/250 s.
- Use your aim light: focus, lock, shoot; avoid chasing moving critters.
- Fine-tune with micro-moves: pivot the snoot, not the housing.
- Check for spill: if you see background glow, lengthen the snoot or narrow your aperture.
- Ethics matter: avoid repeated flashes on light-sensitive species.
Practice & Progression
Start topside—use a coin or shell as your test target.
Then move to sand patches underwater before tackling living subjects.
Once you master aim and distance, explore creative variations: twin snoots, gels for colour play, or dual-light effects combining snoot and soft fill.
Snoot lighting rewards patience—it’s as much about rhythm and observation as exposure.
The Takeaway
Snoots give photographers the power to simplify the scene and amplify emotion. By controlling every ray of light, you reveal shape, story, and silence where chaos once lived.
At Real Focus, we believe learning to snoot isn’t just about gear—it’s about perception. The more intentionally you light, the more meaning your image carries.